This delicious Coconut Shrimp recipe features tender shrimp coated in a crunchy coconut batter and fried to golden perfection. It serves as an ideal centerpiece for any dinner party or casual family meal with its irresistible sweet and savory flavor profile. The combination of crispy batter, sweet flaked coconut, and succulent seafood creates a mouthwatering texture that is perfect for entertaining guests.
| Detail | Information |
|---|---|
| Prep Time | 20 minutes |
| Cook Time | 15 minutes |
| Total Time | 35 minutes |
| Servings | 4 to 6 people |
| Difficulty | Medium |
| Cuisine | Seafood |
| Category | Appetizer or Main Dish |
| Method | Deep Frying |
Why This Recipe Works
This Coconut Shrimp recipe works because it balances the crispy exterior with the delicate texture of the shrimp. I have found through experience that chilling the coated shrimp before frying is the secret to keeping the breading intact. The batter creates a seal that locks in moisture while the coconut provides a sweet crunch that complements the oceanic flavor of the seafood.
Another reason this recipe succeeds is the careful control of oil temperature during the frying process. Maintaining the oil at exactly three hundred and fifty degrees Fahrenheit prevents the coating from burning before the shrimp is cooked through. This attention to detail ensures a uniformly golden and crunchy result every single time you prepare this dish.
The separation of ingredients into flour, batter, and coconut layers allows for efficient assembly. Dredging in flour first helps the batter adhere to the shrimp, while the coconut adds texture. This layered approach maximizes the flavor and creates a professional finish that rivals restaurant quality Coconut Shrimp dishes.
Chef Tips for Perfect Results
Mastering the technique of frying Coconut Shrimp ensures a consistently delicious outcome without greasy or soggy results.
- Dry the shrimp thoroughly: Use paper towels to pat the shrimp dry before dredging them. Excess moisture can cause the batter to slide off during frying and lead to oil splatters.
- Maintain oil temperature: Use a deep fry thermometer to keep the oil steady at three hundred and fifty degrees Fahrenheit throughout the cooking process. Fluctuations in heat can cause burning.
- Prep your station first: Arrange your flour, batter, and coconut bowls in a logical order before dipping the shrimp. This workflow prevents the shrimp from getting soggy while you search for ingredients.
- Chill before frying: Place the coated shrimp on the baking sheet and refrigerate for thirty minutes. This step helps the coating set firmly so it holds together in the hot oil.
- Fry in batches: Do not overcrowd the pot with too many shrimp at once. Adding too many drops the temperature too quickly and results in oil absorption.
- Turn once during cooking: Flip the shrimp halfway through the frying time to ensure even browning. This guarantees a consistent golden color on all sides.
- Drain immediately: Place the cooked shrimp on paper towels immediately after removing them from the oil. This absorbs excess oil and preserves the crisp texture.
Common Mistakes to Avoid
Avoiding common pitfalls is essential for creating the perfect texture and flavor profile in your Coconut Shrimp.
| Mistake | Why It Happens | How to Fix It |
|---|---|---|
| Batter sliding off | Shrimp were too wet or flour layer was skipped | Pat shrimp dry and ensure flour dredge is applied before batter. |
| Oily coating | Oil temperature dropped too much from overcrowding | Fry in small batches and monitor thermometer regularly. |
| Burnt coconut | Oil was too hot before dropping shrimp in | Preheat oil to three hundred and fifty degrees before starting. |
| Pale appearance | Oil temperature was too low to create browning | Ensure oil is consistently hot before adding each batch. |
| Undercooked center | Shrimp were fried for too short a duration | Fry for approximately three to four minutes until golden. |
Variations and Substitutions
There are several ways to adapt this recipe to suit different dietary needs or flavor preferences while maintaining the essential character of the dish.
| Ingredient or Element | Substitution or Variation | Impact on Flavor or Texture |
|---|---|---|
| Batter Liquid | Use club soda or non-alcoholic beer instead of regular beer | Makes the dish alcohol-free and maintains crispiness. |
| Coconut Type | Use large flaked coconut for extra crunch | Provides a more robust texture and visible coconut flavor. |
| Shrimp Size | Use jumbo shrimp instead of medium | Changes portion size and requires longer cooking time. |
| Spice Level | Add cayenne pepper to the flour mixture | Introduces a subtle heat to balance the sweetness. |
| Breading Type | Panko breadcrumbs mixed with coconut | Creates a larger crisp surface area for crunch. |
| Oil Type | Use peanut oil for frying | Offers a high smoke point and neutral taste. |
| Serving Style | Brush with honey or sweet chili sauce | Adds an extra layer of sweetness and sticky texture. |
Serving Suggestions and Pairings
Pairing this Coconut Shrimp with the right sides creates a balanced and satisfying meal experience for you and your guests.
- Serve with pineapple chunks for a tropical side dish that complements the coconut.
- Offer creamy coleslaw to provide a cold and crunchy contrast to the hot fried shrimp.
- Prepare a fresh green salad with lime vinaigrette to balance the richness of the fryer oil.
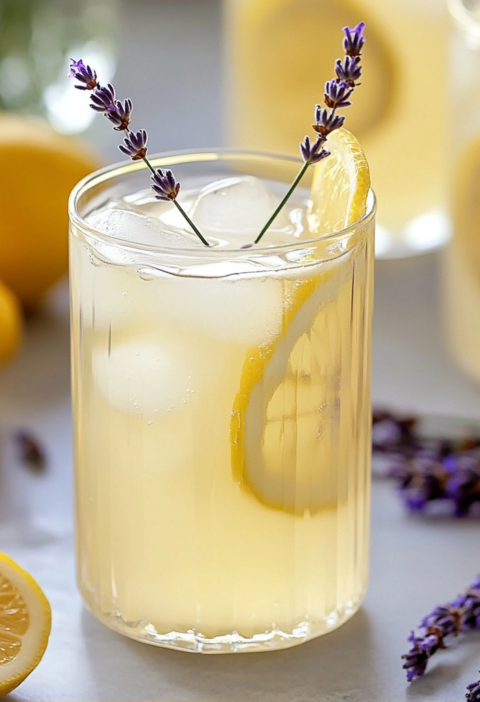
- Pair with a refreshing iced tea with lemon slices to cleanse the palate between bites.
- Include garlic mashed potatoes for a comforting side that soaks up the sweet sauce.
- Top with cilantro and lime wedges for a burst of citrus flavor to enhance the seafood.
- Make a homemade cocktail sauce with horseradish for a spicy dipping option.
- Serve alongside grilled asparagus for a light vegetable component that adds color to the plate.
- Include steamed white rice to provide a neutral base for the strong flavors.
- Prepare corn on the cob with butter to add a classic summer side dish element.
- Create a mango salsa to serve fresh on top of the shrimp for a sweet and savory topping.
- Offer warm tortilla chips for a scoop-friendly alternative to lettuce or bread.
For a complete meal idea, serve ten pieces of Coconut Shrimp as an appetizer followed by grilled chicken or vegetable kebabs as the main course, accompanied by the creamy coleslaw and fresh fruit salad. This combination allows guests to enjoy the tropical flavors without feeling too heavy after the initial indulgence.
Make Ahead Options
You can prepare the Coconut Shrimp batter and coating components several hours in advance without compromising the final texture of the dish.
The shrimp can be peeled, deveined, and dried up to twenty-four hours before frying. Store them in an airtight container in the refrigerator to keep them fresh until you are ready to cook. This preparation step significantly reduces the time needed on the day you are serving the food to friends and family.
The batter mixture should be made fresh right before frying to ensure it is light and airy. However, you can mix the dry ingredients like flour, baking powder, and coconut in advance and store them in a sealed bag. This organization allows for a smooth assembly line when it comes time to coat and fry the shrimp.
Storage and Reheating
Proper storage techniques prevent the Coconut Shrimp from becoming soggy or losing its freshness during the day.
| Method | Duration | Instructions |
|---|---|---|
| Room Temperature | 2 hours | Keep in a single layer on a wire rack to prevent steaming. |
| Refrigerator | 3 days | Store in an airtight container with paper towels underneath to absorb moisture. |
| Freezer | 3 months | Place on a baking sheet in the freezer first, then transfer to a freezer bag. |
| Reheating | 350 degrees Fahrenheit | Use an air fryer or oven to reheat for ten minutes to restore crispness. |
| Make Ahead | 1 day | Coat shrimp and refrigerate until ready to fry for convenience. |
Nutritional Information
Approximate values are based on one serving and may vary depending on exact ingredients and portion size.
| Nutrient | Amount per Serving |
|---|---|
| Calories | 450 calories |
| Protein | 25 grams |
| Fat | 20 grams |
| Saturated Fat | 3 grams |
| Carbohydrates | 40 grams |
| Fiber | 2 grams |
| Sugar | 10 grams |
| Sodium | 800 milligrams |
Frequently Asked Questions
Can I use frozen shrimp for this recipe?
Yes, you can use frozen shrimp as long as they are completely thawed and patted dry before proceeding. Freezing introduces moisture that can make the batter difficult to adhere if not removed properly. Ensure the shrimp are deveined and tails are removed or left as desired based on your preference.
How do I know the shrimp are fully cooked?
The shrimp are done when they turn pink and opaque throughout the center while the exterior is golden brown. Overcooking can make the shrimp tough and rubbery, so visual cues are your best guide. The cooking time usually only takes a few minutes once the oil is at the correct temperature.
What should I do if the batter is too thin?
Add a small amount of flour to the batter if it looks too runny to properly coat the shrimp. The batter should be thick enough to cling to the shrimp without running off too quickly. Adjust the consistency gradually until you achieve the desired thickness.
Is there a non-alcoholic substitute for the beer in the batter?
You can use club soda or non-alcoholic beer as an excellent substitute that still creates a light batter. These options mimic the carbonation and texture without introducing alcohol into the dish. This substitution adheres to dietary preferences while maintaining the crisp quality of the final product.
What sauce pairs best with Coconut Shrimp for dipping?
A sweet and sour sauce or a tartar sauce works wonderfully with the sweet coconut flavor. Sweet chili sauce is another popular choice that adds a bit of heat to balance the sweetness. Choose a sauce that complements the salty and crispy nature of the fried shrimp.
Can I make this recipe gluten-free?
You can use a gluten-free all-purpose flour blend to replace the regular flour in the recipe. Ensure the coconut flakes are certified gluten-free as well to avoid cross-contamination. This modification allows those with sensitivities to enjoy the dish without compromising the flavor profile.
Conclusion
This Coconut Shrimp recipe is a fantastic way to bring tropical flavors to your table without visiting a beachside restaurant. The combination of tender shrimp and sweet toasted coconut creates a memorable dining experience that your family will love. I hope you enjoy the crispy texture and rich flavors of these homemade fried morsels.
Authentic Coconut Shrimp Recipe Best Fried Dinner
Ingredients
Method
- Preheat oil in a deep fryer or heavy pot to 350°F (177°C)
- Pat shrimp dry with paper towels to remove moisture
- Dredge shrimp in flour Season with salt and pepper
- Dip floured shrimp in beaten egg to coat
- Press coated shrimp into flaked coconut
- Lay shrimp on a plate and refrigerate for 15 minutes
- Fry shrimp in batches until golden brown (1-2 minutes per batch)
- Transfer to paper towels to drain excess oil
- Serve immediately with dipping sauce of choice
Nutrition
Notes
Use a thermometer to maintain oil temperature
Chilling shrimp helps breading adhere better
For cleaner frying, use non-reactive oil and keep oil temperature stable